eBook
The Future of Manufacturing:
A Guide to Intelligent Adhesive Bonding Technologies & Methodologies
Contents
Adhesion is integral to the performance of countless products across diverse industries, from intricate circuit boards to towering aircraft. However, despite advancements in bonding technologies, achieving consistently reliable outcomes remains a significant challenge. The manufacturing sector struggles with a lack of comprehensive knowledge and robust methodologies to effectively identify and mitigate factors contributing to inconsistencies, setbacks, and failures in adhesion processes. Addressing this challenge is crucial for ensuring product quality, safety, and long-term performance.
Companies often focus solely on the final step in the overall adhesion process, typically the adhesive application, while overlooking the interconnected system of factors that influence the performance of bonds. This narrow approach underestimates the crucial role of preceding operations like cleaning, treatment, preparation, handling, storage, and testing in ensuring consistent and reliable adhesion. Addressing adhesion problems solely at the application stage invites chronic failures and suboptimal outcomes.

Leveraging our extensive partnerships with hundreds of leading global manufacturers and in-depth analysis of countless bonding failures, this eBook offers a treasure trove of insights on how to solve invisible problems that plague adhesive bonding operations in manufacturing. Within this eBook, you’ll discover valuable strategies to improve operational efficiency, elevate product quality and performance, and how to gain a competitive edge using intelligent technologies and methodologies.
Download Your Personal Copy of This eBook

Fill out the form to receive your personal copy of the eBook.
Download the eBook Here
The High Cost of Adhesive Bonding Failure
Adhesion failure results in significant expense, including scrap, rework, sales returns, warranty claims, product recalls, and production delays. Additionally, because adhesion problems are sometimes intermittent and root causes are often not discovered, many of the costs are hidden because they have been included in cost standards and warranty allowances.
Scrap
Many companies include a certain amount of scrap as a cost of doing business. However, when a 3% scrap rate (which has been maintained by current operations) needs to be reduced to 2% due to economic pressures, finding out exactly what is causing the scrap becomes paramount. If there is no identifiable cause, then there can’t be an identifiable solution.
Rework
Much like the example of sending a part back through a parts washer, re-doing work that has already been done is a common symptom of a company that experiences adhesion issues.
Excessive preparation steps that are ineffective can deeply cut into the bottom line.
Recalls
Adhesion failure due to unknown causes is unpredictable, which means failures may occur once the products are in the customers' hands.
With safety-critical applications in medical devices, aerospace, consumer goods, and other industries, failures that result in recalls can have significant financial consequences.
Reputational Costs
It can be extremely difficult for companies to combat bad press due to adhesion failures that result in unreliable products.
With social media accelerating the dissemination of this kind of information, it’s all the more crucial for companies to stop adhesion problems before they start or get to the root cause quickly.
Lost Business Opportunity
If a company’s leadership is not confident in the adhesion process, new innovations in advanced materials or new products may never reach the marketplace, preventing a company from taking advantage of technology innovations that could differentiate them from competitors.
For example:
- An advanced composite may not be used because the manufacturer is not confident in the reliability of an adhesively bonded structure.
- Because a medical device manufacturer cannot provide validation that a coating is uniformly applied in a critical application, they cannot obtain regulatory approval.
- “Random” adhesion failures may cause management to abandon a previously chosen manufacturing process.
- Failure of sealants in electronic control systems of products such as cars, planes, machinery can result in bodily harm and loss of life.
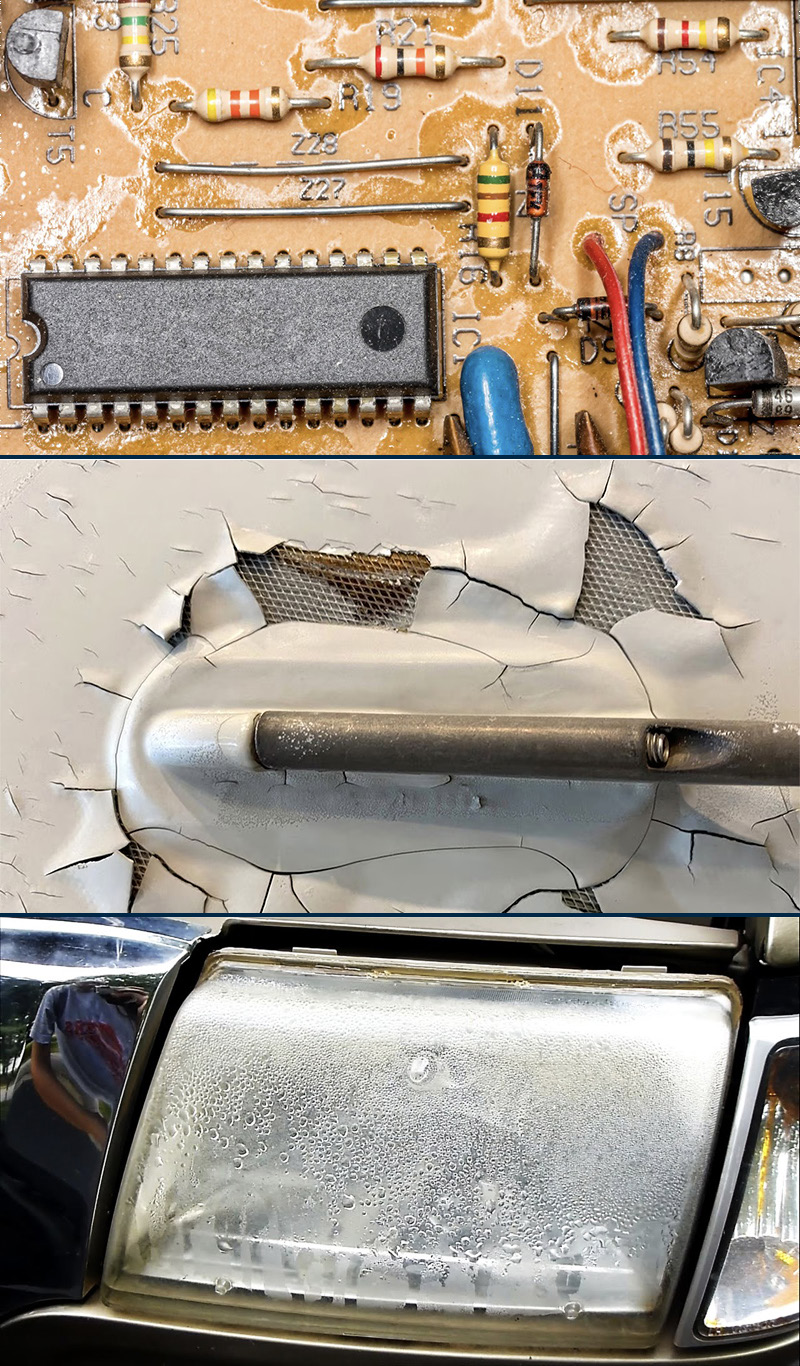
Every consumer has personally experienced some form of adhesion failure, whether it is paint peeling, bond failure of glued assemblies, delamination of electronic boards, ink failing to adhere to packaging, fogging of headlight assemblies due to moisture ingress, premature peeling of labels, poor coating uniformity, etc. The success of these applications all rely on holistic control of the adhesion process to ensure quality output. To do this effectively, it is worth remembering that you cannot control what you cannot measure.
Watch “Recall Mystery - What Causes Wind Turbines to Wilt Like a Daisy?” to discover how manufacturing wind turbines has been a major challenge.
How Adhesive Bonding Issues Impact Product Lifecycle
Companies fall into one of three categories depending on where they exist in the supply chain. Each of these company categories has specific objectives and specific quality assurance requirements:
1. Component Manufacturers are predominantly in the business of creating components via processes such as molding, stamping, or machining that will later be assembled into a final product. These components must conform to the customer’s specifications and will be integrated into a production process that will frequently include cleaning and perhaps surface treatment operations prior to bonding, sealing, or coating.
Their customers are concerned with critical surface quality and so they have to be as well. To stay competitive in this market, component manufacturers must control the cleanliness and perhaps surface treatment level to ensure the quality and consistency of the components delivered to their customers. This means not only creating the right surface in the manufacturing process but also packing and shipping the parts in a manner that ensures preservation of the required surface state up to the point of receipt by the customer.
2. Component Assemblers who assemble components into final products utilize processes that frequently include painting, coating, bonding, sealing, laminating, and printing. If the final product quality is poor due to a failure to adequately control surface properties, costly fixes may be required to solve recalls and warranty claims. Profitably and reputation suffer as a result.
3. Vertically Integrated Manufacturers have the task of coordinating the totality of operations. The entire organization needs to be sensitive to surface critical processes and communicate effectively across departments regarding these processes to ensure predictable adhesion performance. This requires appropriate specifications and quantitative surface-sensitive inspections to achieve complete control over their adhesion processes.
Within each organization, there are two types of teams:
1. Product design teams who must design in cleanliness and/or treatment level specifications and make considerations for mitigating likely issues that will arise.
2. Production teams who must control the variables that affect cleanliness, treatment, and adhesion success.
The success of an adhesion process depends on consistent and controlled surface properties. These properties are affected by every step in the manufacturing process, from synthesis of the material all the way to final assembly. Regardless of where manufacturers exist in the supply chain, every role within the enterprise must build assurance into their cleaning, surface treatment, and adhesion processes.

Common Methods for Evaluating Surface Quality
Dyne Testing
Dyne testing is a common method for estimating surface energy. An ink of specific surface tension is applied to the surface, and the wetting behavior is visually compared to pre-established pass/fail levels. Dyne testing has significant drawbacks as a surface measurement method.

The results are subjective; the inks contaminate the parts being tested, the method is insensitive to soluble contaminants, and it can expose the user to harmful substances.
Water Break Testing
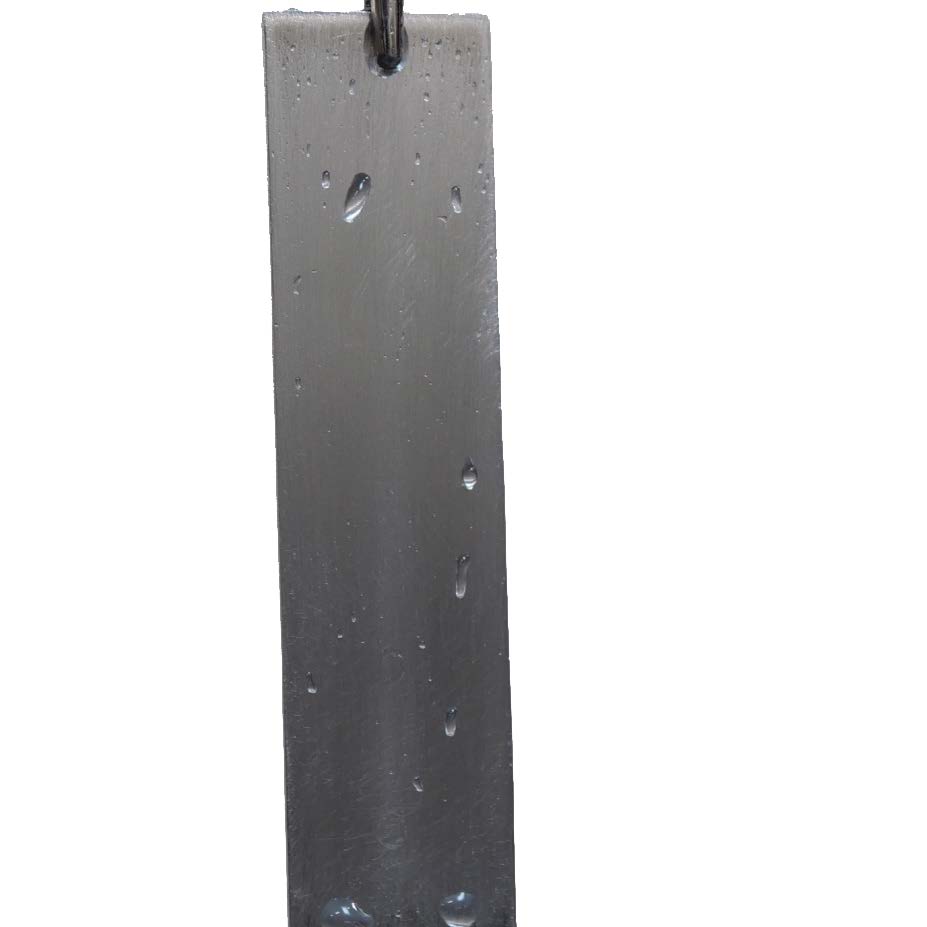
Water break tests are commonly used to assess surfaces for the presence of hydrophobic contaminants that repel water (causing it to bead up) and can adversely affect adhesive bonding performance. This test involves dipping or spraying an object with water and observing how the water behaves on the material.
Like dyne testing, water break tests rely on individuals to subjectively interpret the results of the test. This test is unable to detect hydrophilic contaminants like surfactants from incomplete rinsing. Moreover, using impure water can introduce contaminants to the surface, creating cleanliness issues instead of detecting them.
Ionic Contamination Testing
Ionic contamination testing is commonly employed in the electronics industry
to detect the presence of conductive particles on electronic components. This process involves dissolving surface residue in an alcohol solution and then measuring its conductivity to estimate its ionic content.
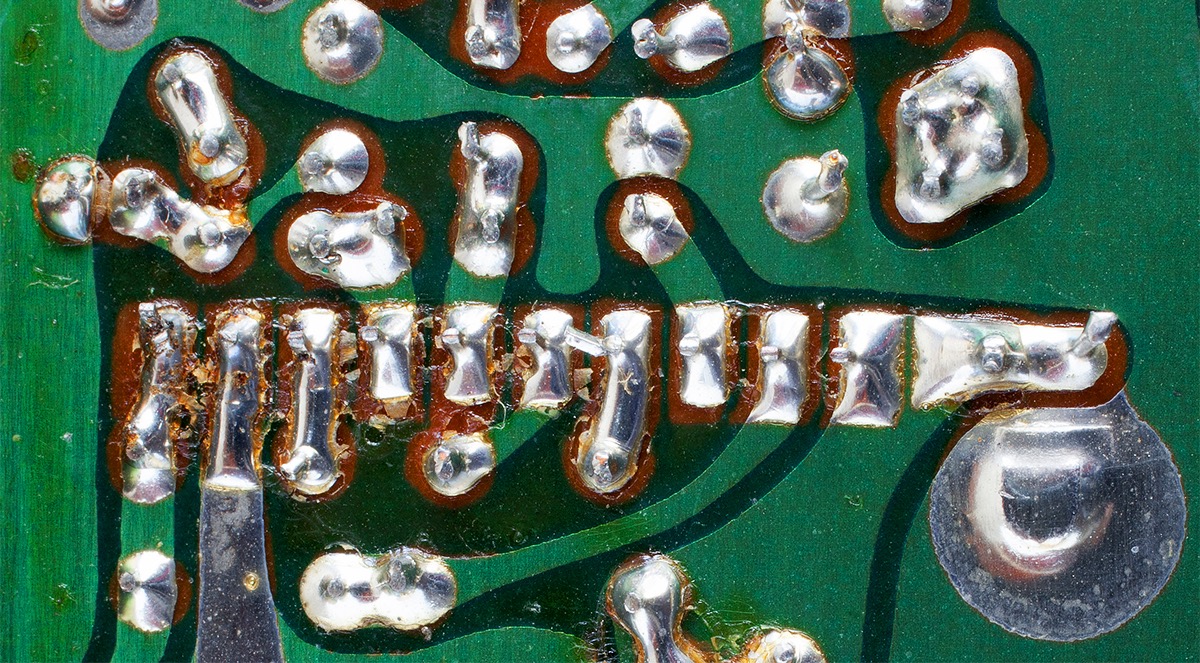
While helpful in identifying the presence of conductive contaminants, these tests don’t detect non-ionic contamination, which is the source of adhesion issues for conformal coatings or adhesive bonds.
Contact Angle Measurement
To measure a contact angle, a drop of water is deposited on a material surface in a controlled manner; the resulting drop shape (defined by the contact angle) is determined by the surface energy. This surface energy correlates directly to a material’s ability to adhere.
A high contact angle (where the drop beads up) means that the drop is being repelled by the surface. This equates to a low surface energy. A low contact angle (where the drop spreads out) means that the liquid is being attracted strongly to the surface, and correlates to a high surface energy.
This test is a quantitative, objective measurement that reliably reflects the molecular-level cleanliness and treatment level and quantitatively predicts adhesion.
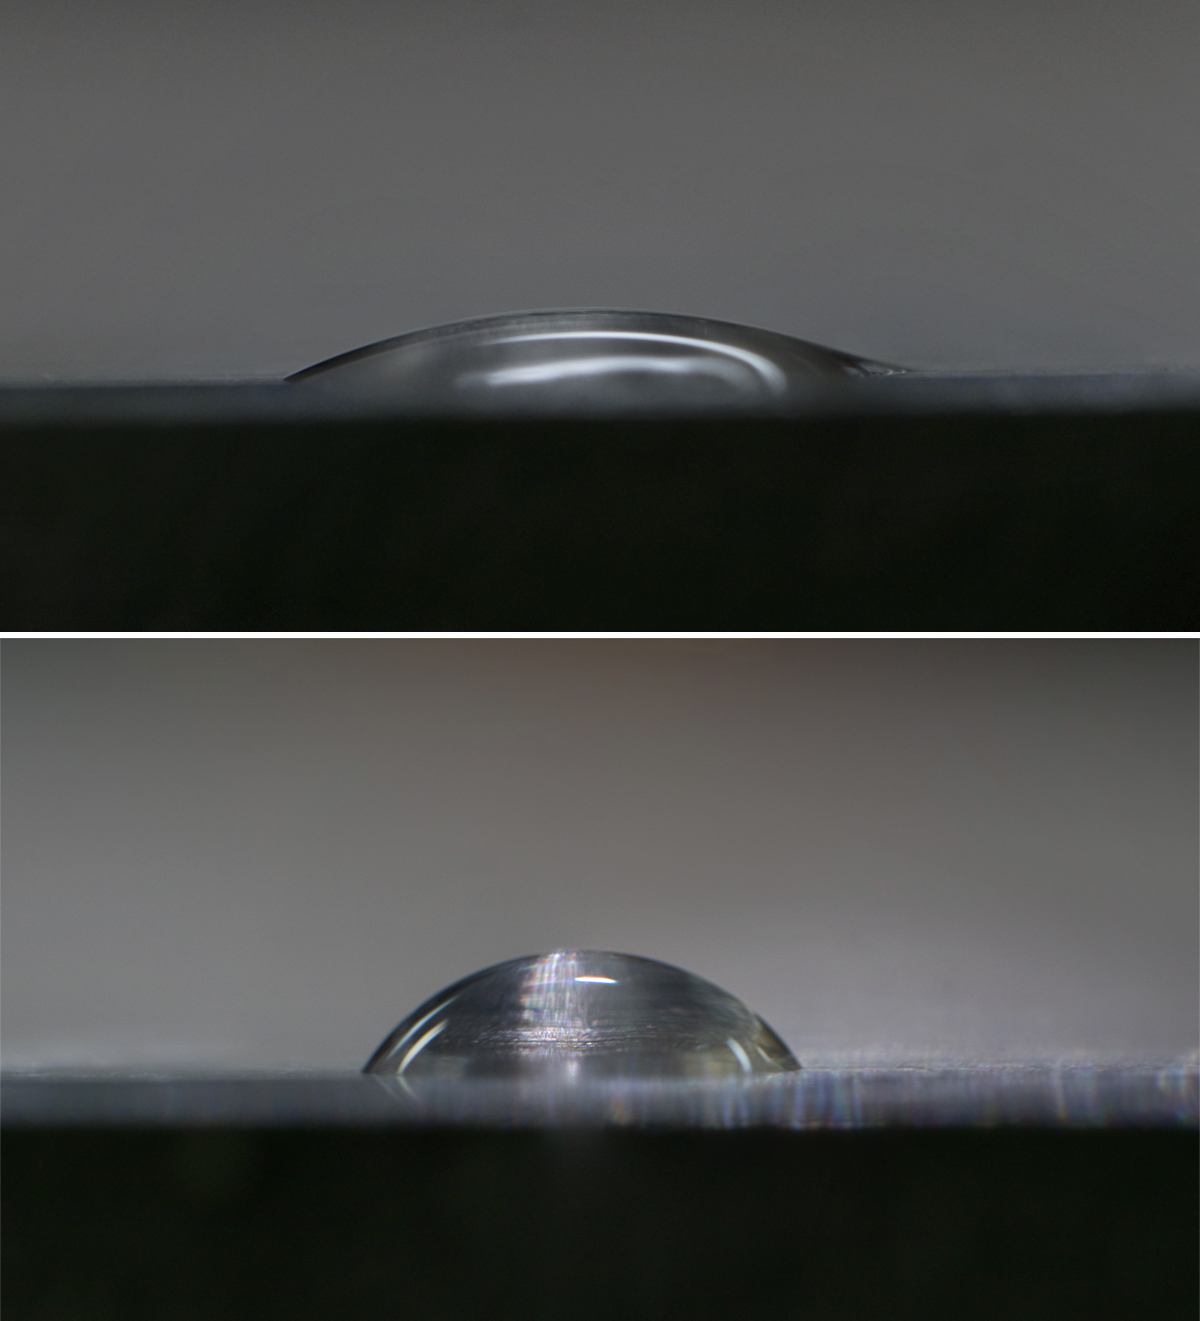
In addition to measuring cleanliness, treatment level, and predicting adhesion, contact angle measurements can also be used to quantify the properties of surfaces that are designed to repel substances, like hydrophobic coatings on objects like wires, catheters, or other medical devices. In these situations, uniformly high contact angles confirm that coatings or treatments have been applied.
Until recently, these measurements were typically performed on laboratory samples using a bench-top goniometer. However, recent developments in portable contact angle measurement devices enable these measurements to be conveniently deployed directly on the plant floor in many otherwise inconvenient and difficult applications.
These instruments remove subjectivity and enable the development of surface quality specifications during product development that translates directly to manufacturing control specifications that confirm the surfaces created in manufacturing are properly cleaned and/or prepared for reliable, predictable adhesion of coatings and adhesives.
Why Adhesion Problems Persist
The “Knowing-Doing Gap”
Surface-related problems (like adhesion) are the silent assassins of many products. Determining the root cause can be like untangling a web of invisible threads because, typically, the sources of many adhesion issues are not visible to the human eye.
Additionally, despite the effort put into solving these problems, the valuable insights gained during problem-solving, their root causes, and the hard-won solutions often remain isolated in one part of the organization. As a result, the same issue could occur in another department or manufacturing site, requiring the same issue to be resolved again.
This disconnect can create a vicious cycle of recurring problems. This “knowing-doing gap” is a major roadblock to achieving operational excellence in complex systems. To achieve sustained operational excellence, bridging the gap between “knowing” and “doing” in surface-quality control is essential. Organizations must actively capture and share surface-related knowledge, preventing the persistent reoccurrence of issues and ensuring long-term success.
Read more about the knowing-doing gap in this article, “The Knowing-Doing Gap: How to Avoid Widespread Adhesion Issues.”
“Knowing:” Predictable Adhesion Requires Precise Control Over 3 Elements
Many manufacturers have struggled to predict the reliability of bonded structures despite numerous attempts to solve these problems permanently. Often, the root cause of failure is never discovered. An adhesion problem may be ‘solved’ for a while but then reoccur without warning.
Conceptually, reliable, predictable adhesion requires precise control of only three things:
1. The composition of the adhesive or coating material.
2. The application and curing processes.
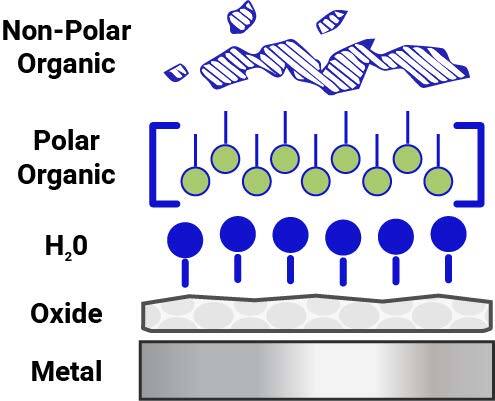
3. The composition and properties of the first few molecular layers of the surface prepared to receive the adhesive or coating.
Adhesive manufacturers generally do an excellent job of tightly controlling their formulations and manufacturing processes, and the technology behind this is well established (factor 1 above).
Consequently, manufacturers can be highly confident in the repeatable, controlled properties of most adhesives and coatings.
Similarly, adhesive or coating application and curing processes (factor 2) are well-defined and relatively easy to control in a quantifiable manner. Problems stemming from improper application and curing are generally readily identifiable and straightforward to correct.
Consistent control of the surface composition and properties (factor 3) throughout the entire adhesion process continues to represent the biggest obstacle to reliable bonding and coating processes. Surface properties are the least understood and most poorly controlled of the three factors influencing adhesion and are usually where the problems arise. Control of the surface can be difficult because the properties of a surface are influenced by many factors that are not often considered when designing and implementing manufacturing processes.
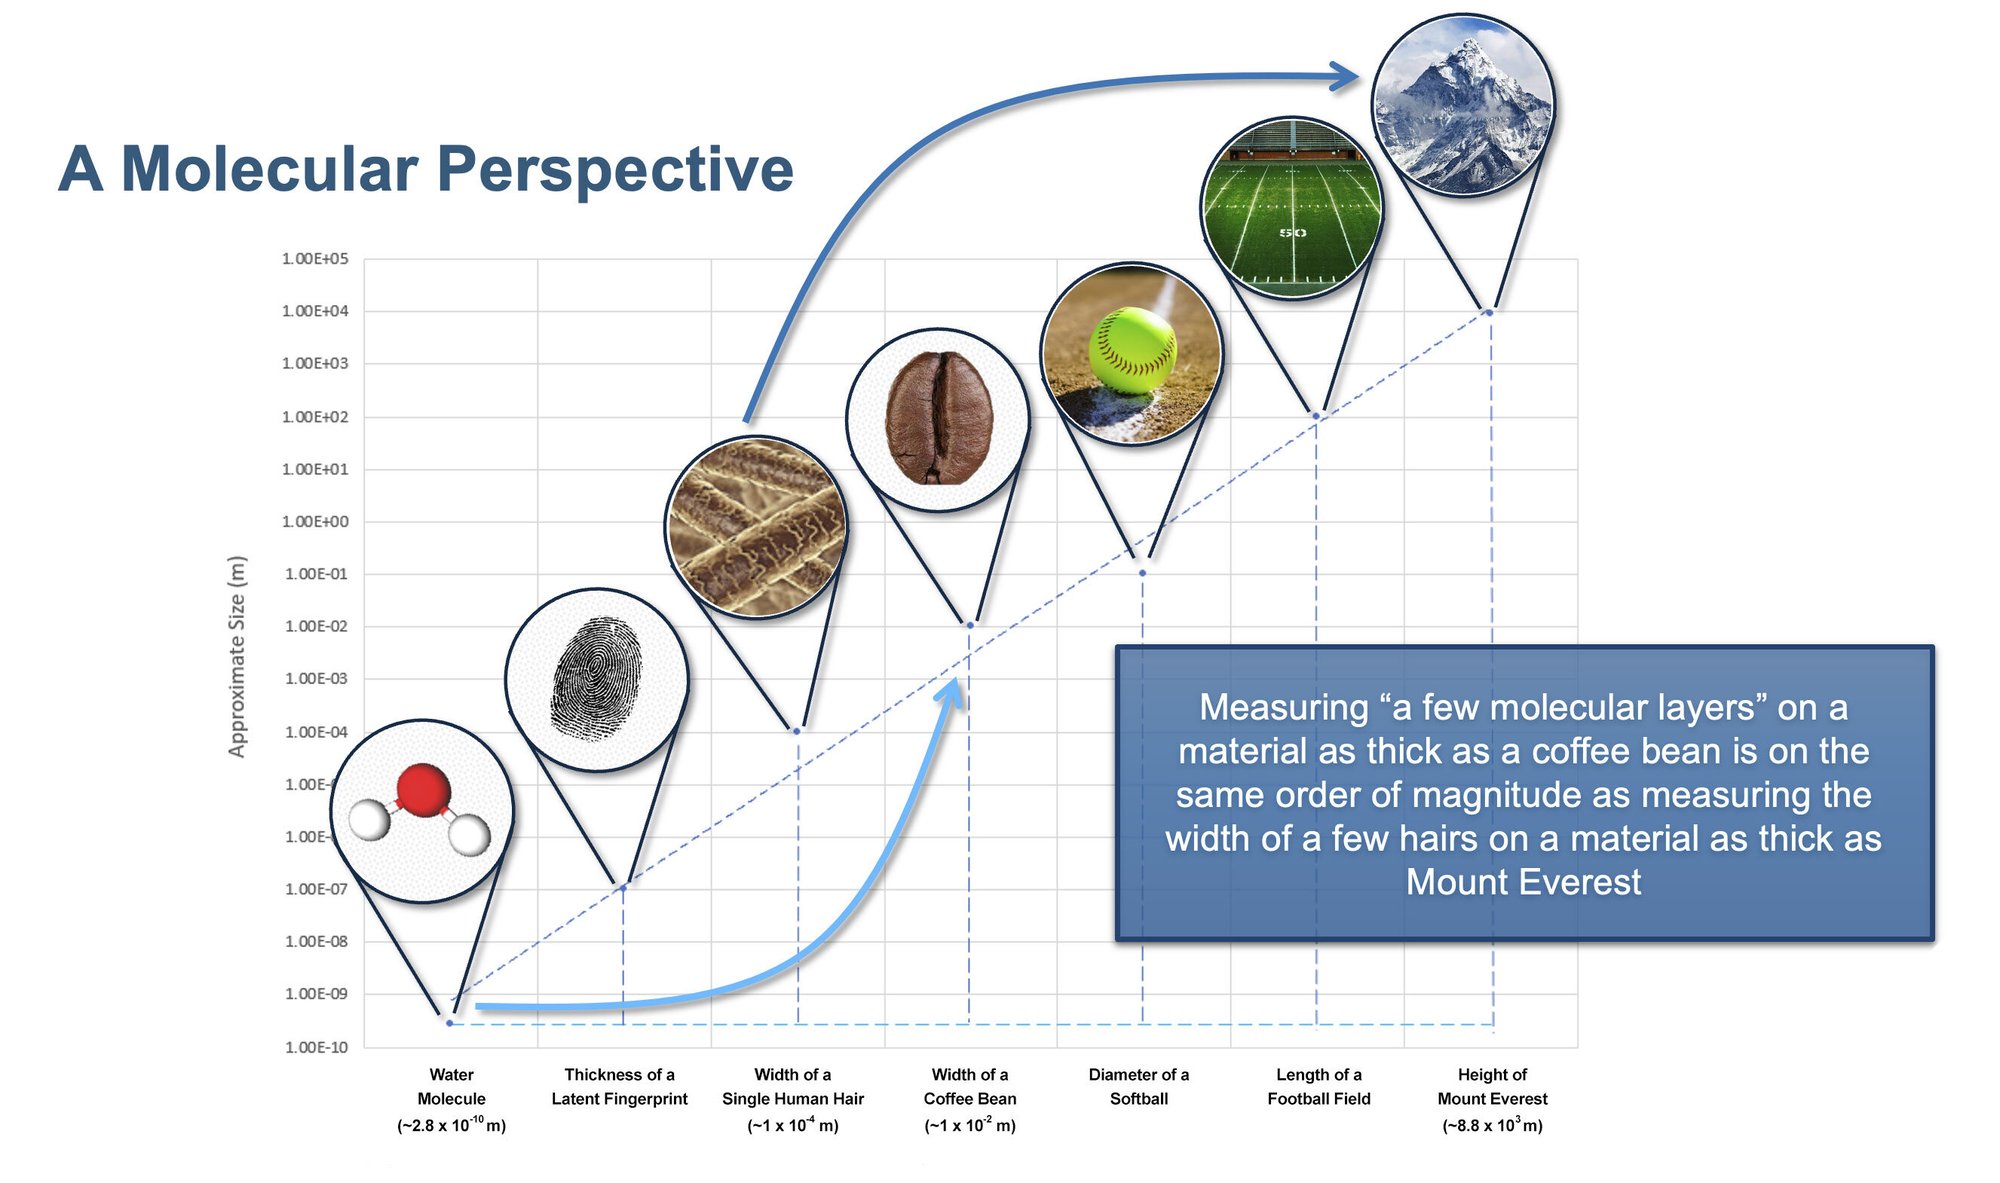
The first molecular layers of a surface, the ones most important for establishing a strong and reliable interface with a coating or adhesive, are highly reactive and can rapidly change in response to handling and environment. This means the quality of material surfaces can change from acceptable to unacceptable within minutes of preparation.
Image: Measuring ‘a few molecular layers’ on an object the size of a coffee bean is equivalent to measuring the width of a few hairs on an object the size of Mount Everest.
Download Your Personal Copy of This eBook

Fill out the form to receive your personal copy of the eBook.
Download the eBook Here
“Doing:” A New Way to Gain Certainty
Setting and achieving quantitative goals for surface cleanliness and treatment levels means manufacturers can greatly reduce or eliminate the need to factor scrap costs into the economics of the bonding, coating, or sealing process.
These quality goals are readily achievable by implementing these process control and validation methods:
1. Adopt Surface Intelligence
Manufacturers are accustomed to thinking of their adhesion process only as the point at which a coating, sealant, or adhesive is applied and cured. Surface Intelligence is the recognition that surface properties important for adhesion are affected at many points in the whole manufacturing process, starting with the material manufacture and extending through the supply chain, storage conditions, transport and handling, and finally, the ultimate cleaning and surface treatment that occurs immediately prior to application and curing.
Redefining the adhesion process to include every aspect of the production process that affects the surface properties important for adhesion frequently brings to light the multiple points throughout the process where measurement and control may be necessary: the Critical Control Points (see below). This awareness gives manufacturers a more holistic picture of what it takes to achieve successful adhesion. Surface Intelligence is a science applied to real-life adhesion, manufacturing, product development, and supply chain challenges.
Surface Intelligence is about measurement and alignment between people, departments, and suppliers. It gives organizations a common language and a network of data to promote innovation and continuous improvement and the ability to improve continually.

2. Know & Manage Critical Control Points
Applying Surface Intelligence reveals the Critical Control Points of a manufacturing process. A Critical Control Point is any point in a production process where a material surface can change, intentionally or not, in a way that can affect the final bonding, sealing, or coating process. These control points and the effects they can have on a material surface are not necessarily obvious to the casual observer.
For example, Critical Control Points usually occur at any point in a process where parts are handled or stored (e.g., receiving incoming material, warehousing), forming and machining operations, transport and storage of subassemblies, and cleaning or activation steps immediately before the bonding or coating operations themselves.
To achieve consistent final bonding, coating, or sealing, manufacturers must closely monitor and control every step in the process. This ensures consistent surface quality throughout, which is crucial for successful results.
Read more about Critical Control Points in this article, “How to Control Your Adhesive Process: Find the Critical Control Points.”

3. Use Quantifiable Surface Readiness Measurement
A quantifiable surface readiness measurement provides a common language, facilitates clear communication, and enables proactive mitigation strategies for surface quality. consistently repeatable and high-quality adhesion. Failing to establish this shared language risks costly product failures and jeopardizes customer satisfaction. Employing quantifiable surface measurements makes the difference between steering confidently or navigating blindfolded amidst potential crises.
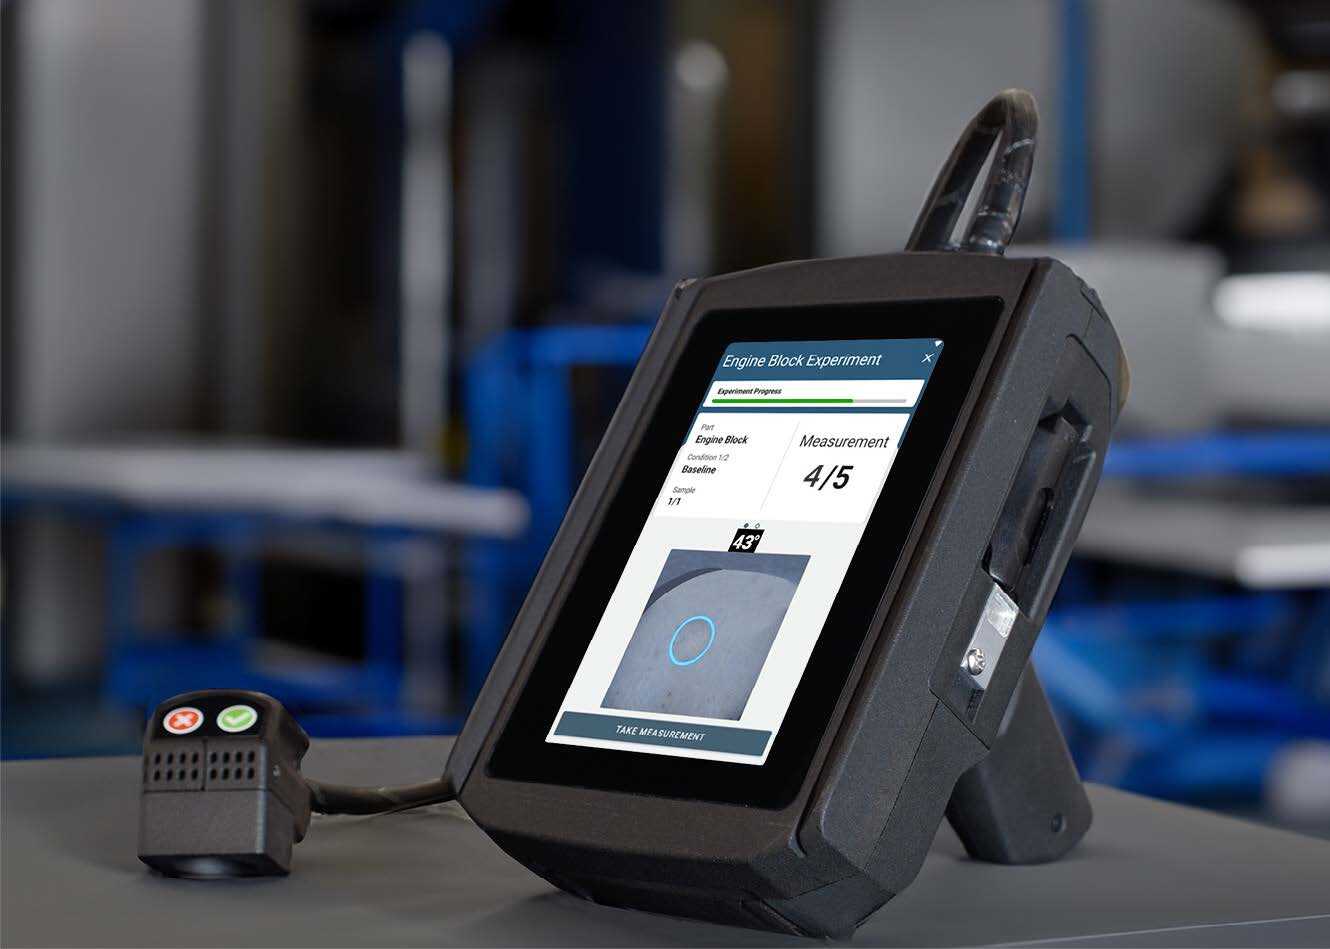
The best way to create surface quality specifications (the common language) is to use non-destructive tools like BConnect that implement rapid contact angle measurements directly into the production process. Contact angle measurements are a highly reliable, objective, and quantitative test method for determining a surface’s readiness for adhesion or its chemical cleanliness.
4. Add Surface Readiness as a Key Performance Indicator (KPI)
Surface readiness plays a critical role in overall product quality. That’s why it’s necessary to add surface readiness as a KPI and integrate it into existing quality programs.
By adding surface readiness measurement as a KPI, your organization can track and trace progress and measure against defined goals. This new area of opportunity will enable the business to identify new areas for improvement and optimization across multi-site plant locations and production lines.
5. Create Surface Preparation & Treatment Standards
A meticulously designed surface preparation methodology and specification is essential to guarantee the integrity and long-term performance of bonding, sealing, and coating systems. This critical foundational process is a key to meeting customer expectations and maintaining competitive advantage.
For example, several adhesive manufacturers have added recommended contact angle ranges to their technical data sheets (TDSs) to provide their customers with metrics to ensure success in their manufacturing processes. Product design groups that also create these specifications can rest assured that the adhesion or coating in manufacturing will be high-quality and repeatable.
6. Equip Your Process with the Proper Equipment to Measure, Analyze, & Share Surface Quality Data
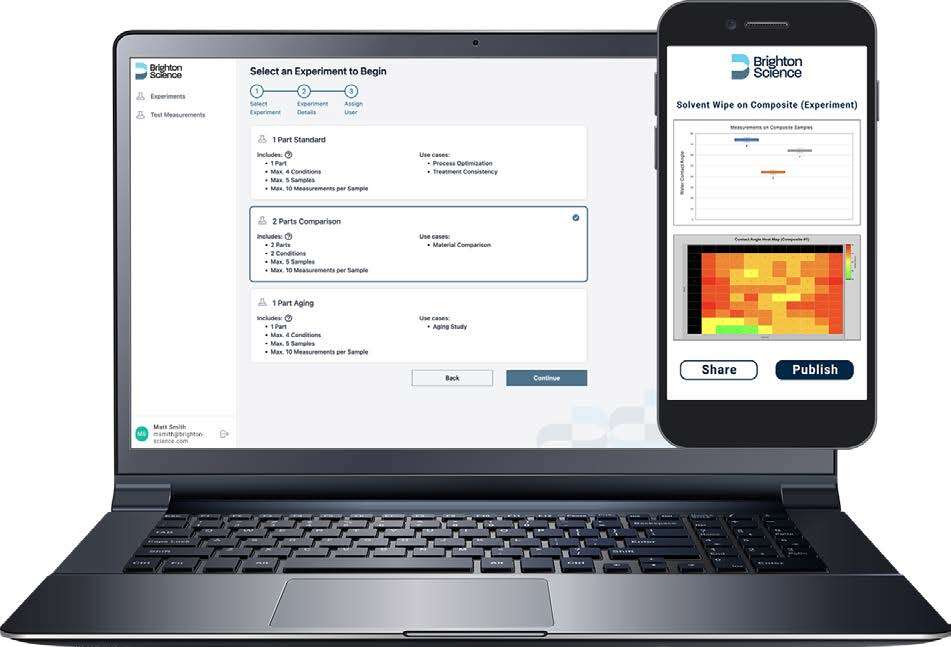
Combining intelligent surface measurement tools (mobile or in-line) with a Surface Intelligence Network permits real-time determination of surface readiness of your material and minimizes the risk of product failures. This combination enables organizations to:
- Define surface readiness specifications in an FMEA
- Track and trace measurements to compare against expected values
- Identify patterns and trends in surface quality and adjust processes accordingly
- Facilitate innovation in new ways of building products
- Troubleshoot and optimize processes
- Improve overall quality and consistency by easily sharing real-time data across different production lines and across the globe for multi-site manufacturing facilities.
- Bridge the “knowing-doing” gap throughout the enterprise.
How Does Brighton Science Assist Companies in Implementing This Solution?
- Brighton Science takes a collaborative approach to optimizing manufacturers' adhesive bonding processes. We begin by understanding your existing production plan and working hand-in-hand to identify critical aspects for improvement. Through this partnership, we will guide you towards achieving reliable adhesion for superior product quality.
- Brighton Science maintains a state-of-the-art materials science laboratory, and its staff of chemists and materials science experts offers a broad array of materials science services to manufacturers, including many of the most advanced manufacturing companies in the world.
- Applying an efficient approach to diagnostics, we receive customer samples, design specific tests, and issue comprehensive recommendations to the manufacturer to control their adhesion issues. Brighton Science offers an advanced technological suite of hand-held and automated surface measurement inspection products and software to help manufacturers monitor and validate surface cleanliness conditions.
Please contact one of our experts to explore how Brighton Science can help your business improve its manufacturing processes related to adhesion, coating, bonding, and other material processes.

